‘Sprouts Weekly’ – A machine to grow bean sprouts
I always have been fascinated by growing things in an automated way. For instance, I absolutely adore the FarmBot project and would really like to build such a machine once I’ve got time and money for it. Until then, I focus on smaller projects, like the one described here. This small device provides me and my wife a fresh and healthy portion of bean sprouts every week.
Concept
Growing bean sprouts is very simple: get some mung beans, put them in some box, moisten them daily and in 5-7 days you will have bean sprouts. While growing, keep them in a dark place. However, if you forget to water them, they will dry out and your crop will fail to grow.
So that’s where the idea of this project started: automating the watering so I don’t need to think about it. Basically I need some water reservoir, a small pump and some electronics to activate the pump now and then.
Parts
This is the parts list, * marked parts are described in the text below:
- Arduino Uno *
- 12V DC single channel relay board with screw holes *
- small 12V DC pump *
- 12V DC power supply, at least 500mA.
- 4x M4 threaded rod, 18cm
- 8x M4 nut and washer
- 8x M2.5 x 12 bolt and nut
- frame parts (3D printed) *
- 2x disposable PP microwave tray, 165 x 110mm (measured just below the rim), available at any chinese take-away in the Netherlands *
- about 1 m PVC hose, 9mm diameter
- some wires (you may use jumper wires with pins attached)
- mung beans to grow
The most notable component for this project is the water pump. I found a very small (56 * 52 * 47mm) brushless DC pump by Anself in one of my favorite Chinese web shops for electronic parts. It provides a throughput of 240 l/hr while running on 12 Volts. It comes with a bracket for easy mounting to a surface. Other pumps will work for sure, as long as the throughput is not so high that water is flushing away the beans, or worse: your growing machine will merely act as a fountain.
To switch the pump I used a simple relay module. The module is powered with 12 Volts as well, and can be controlled by a logic input. When buying, please note that you buy (1) a 12 Volts version, (2) with screw holes, (3) which can handle 5 Volts logical input (so not 3.3 Volts).
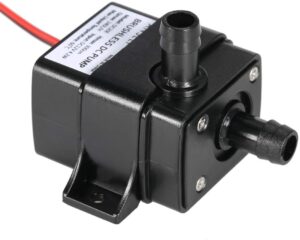
12V water pump by Anself 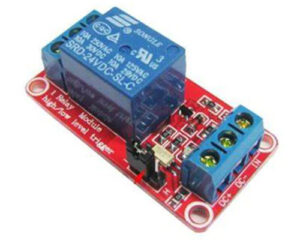
12V relay module, 1 channel 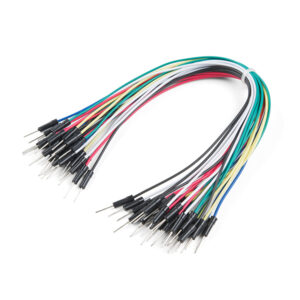
Jumper wires

Also, I used a Arduino Uno as a controller. If you know my blog, you will have noticed that I’m fan of the Arduino microcontroller platform due to its ease of operation, a great variety of sizes/models and a large online community/installed base.
In my country (Netherlands) chinese take-away restaurants are very popular. Most food is served in small plastic trays. After eating the delicious food we clean those trays and keep a bunch of them in stock. We use them for all kind of purposes, including storing own food in the freezer, keeping stuff together for my electronics projects, sorting Lego parts, etc. They measure 165 x 110 mm (rim excluded) and come in different depths. If you’re not in the Netherlands, search the web for ‘pp disposable food container’.
In this project I applied two of these trays and designed a frame to stack them. I made 4 small holes in the upper tray using a 5mm drill. The idea is that water is stored in the lower tray and every few hours this water is pumped into the upper tray (where the mung beans are). The water runs through the holes, back into the lower tray, leaving behind the wet beans.

Chinese take-away, served in trays 
A single tray

It took me two iterations to design the perfect frame. This frame allows you to stack both trays, while the electronics is places on one of the sides. All parts are joined using four threaded rods (M4) and some nuts and washers.
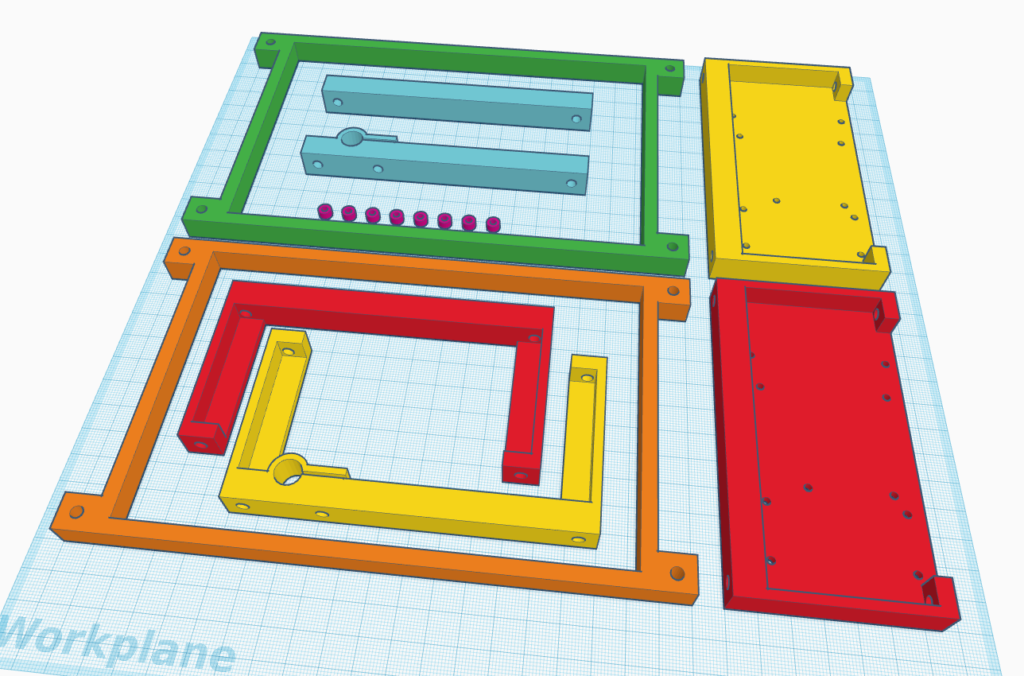
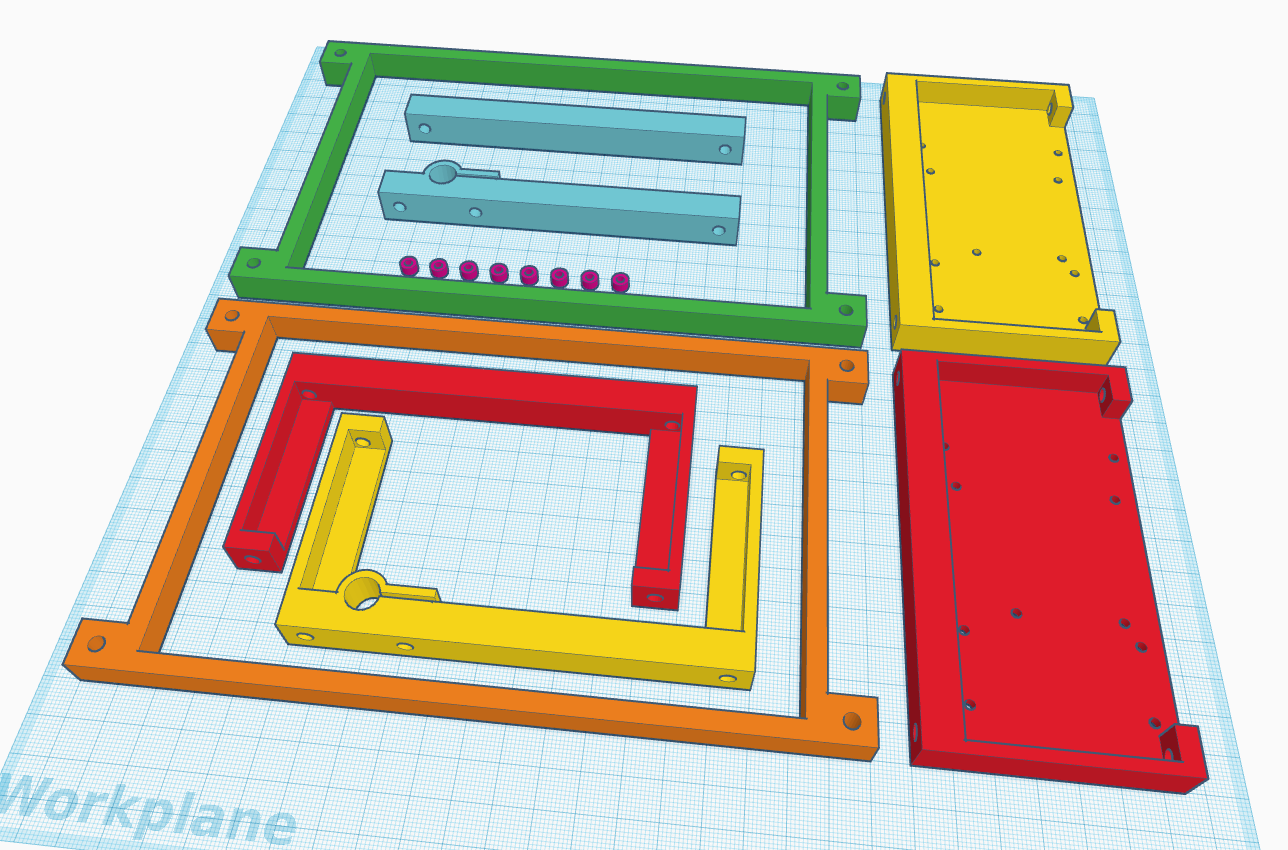
All parts of the frame, drawn in Tinkercad. 
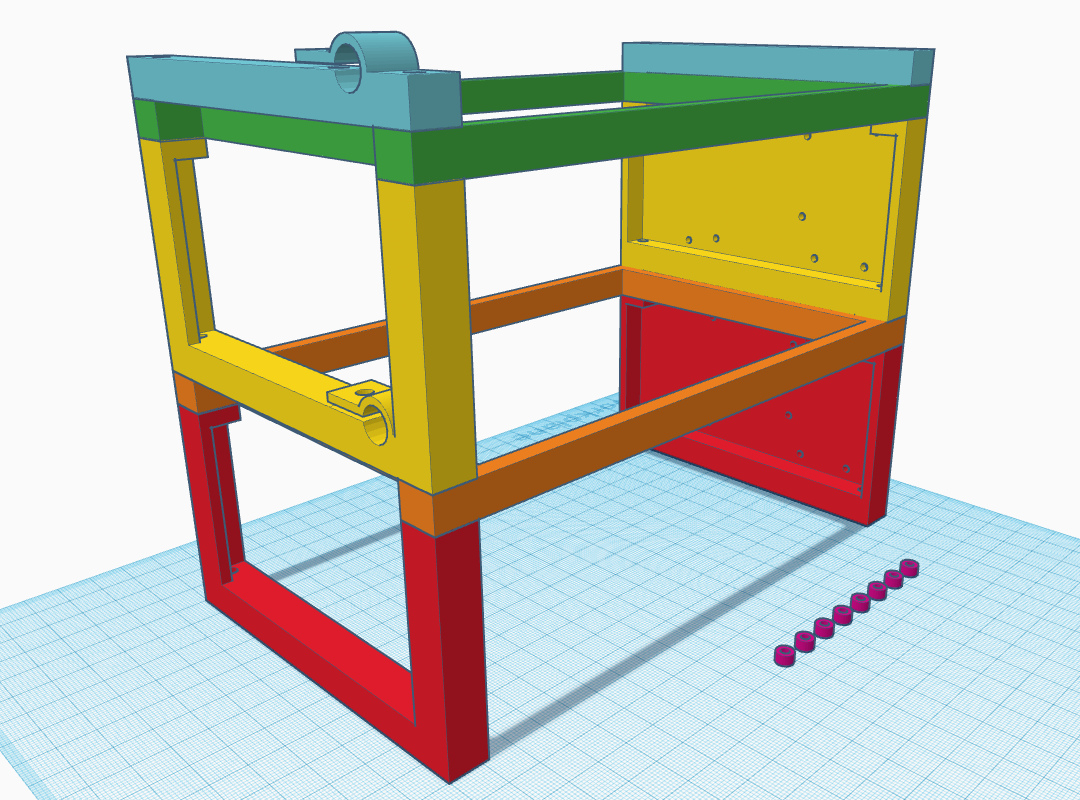
Frame parts, now stacked.
I also needed some hose. I used 9mm (outside diameter) transparent PVC hose, sold at my local DIY shop. If not available, try a local aquarium shop, they might sell a suitable pump too.
Finally I used a second hand 12V DC adapter form my junkbox to power the lot.
Building
Download the 3D files and print them using your favorite 3D printer. I printed them on my CR-10s Pro using PETG filament, 280 micron layer height.
Use the pictures of the frame shown above to put it together (note the part colors). Insert an 18 cm M4 threaded rod in each corner and finish both ends with a M4 washer and nut.
Next use M2.5 bolts and nuts to mount the Arduino, relay board and pump to the closed side of the frame. Spacers are included in the 3D print (not required for the pump). Set the jumper on the relay board to ‘H’.
Order some food at a chinese take-away somewhere in the Netherlands, eat it, clean the trays. Drill 4 holes (5mm) in one tray and place it in the upper part of the frame. The other tray goes at the bottom.
Attach a piece of hose to the pump’s output and lead it to the upper tray. Push it through the hole provided, allow 10cm extra to slope down to the bottom. Attach another piece of hose to the pump’s input and lead it to the lower tray, again push it through the hole and ensure the tube touches the bottom of the tray.
Now do the electrical wiring, all wires are connected to the relay board, so let’s use that as a ‘hub’:
- Examine the relay board. At one side you will find screw terminals labeled DC+, DC- and IN. At the other side there is another set of screw terminals labeled NO, COM and NC.
- Attach the power supply to DC+ and DC- (be sure the polarity is correct).
- Also connect DC+ and DC- to the Arduino pins Vin and GND.
- Connect the IN terminal with pin 12 of the Arduino.
- Place a wire from the DC+ terminal to the other side of the relay board, to the COM (common) pin.
- Connect the pump’s red wire (+) to the NO (normally open) terminal of the relay board.
- Connect the pump’s black wire (-) to the DC- terminal of the relay board.
Code
The Arduino code is rather straightforward. The loop powers the motor for 3 seconds, then turns it off again and then waits for 6 hours. Then the loop starts all over again. During the 6 hour waiting the Arduino’s build-in LED on pin 13 blinks every second, a bit longer when another minute is passed. This is just for monitoring, to let you know the machine is still alive.
You can upload the code to your Arduino using the Arduino IDE.
Result
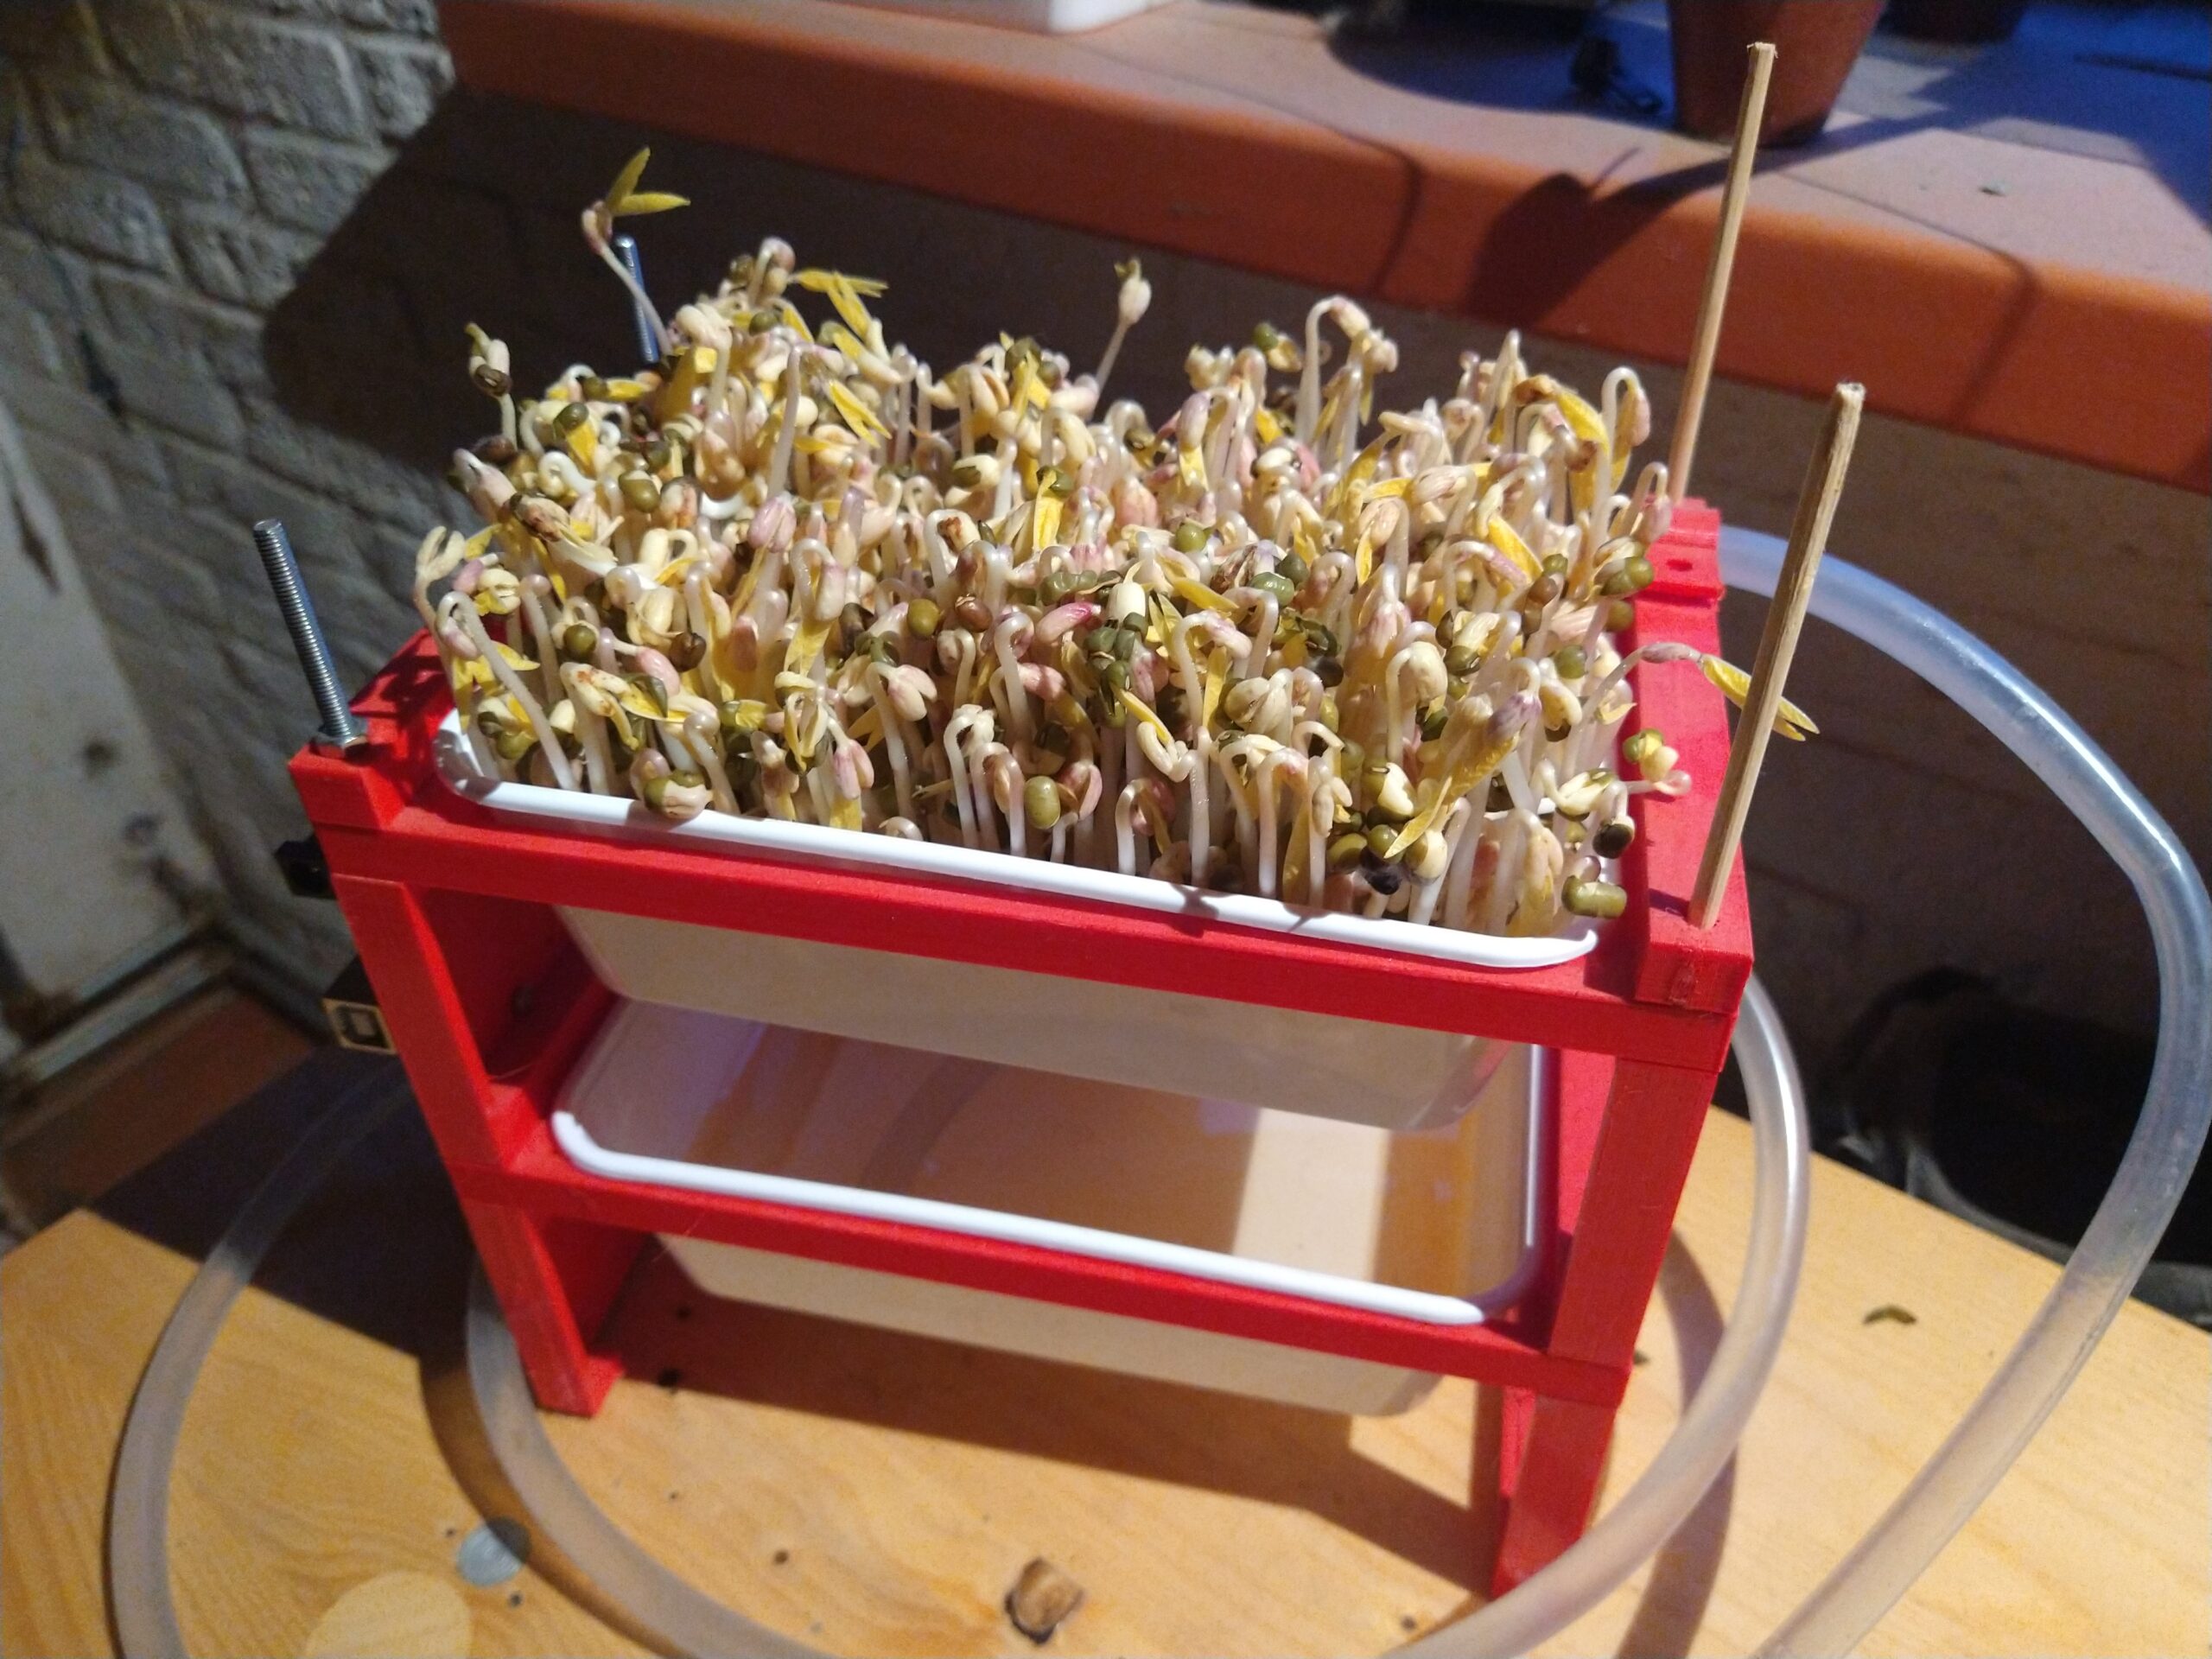
The movie and pictures down here show you my result:
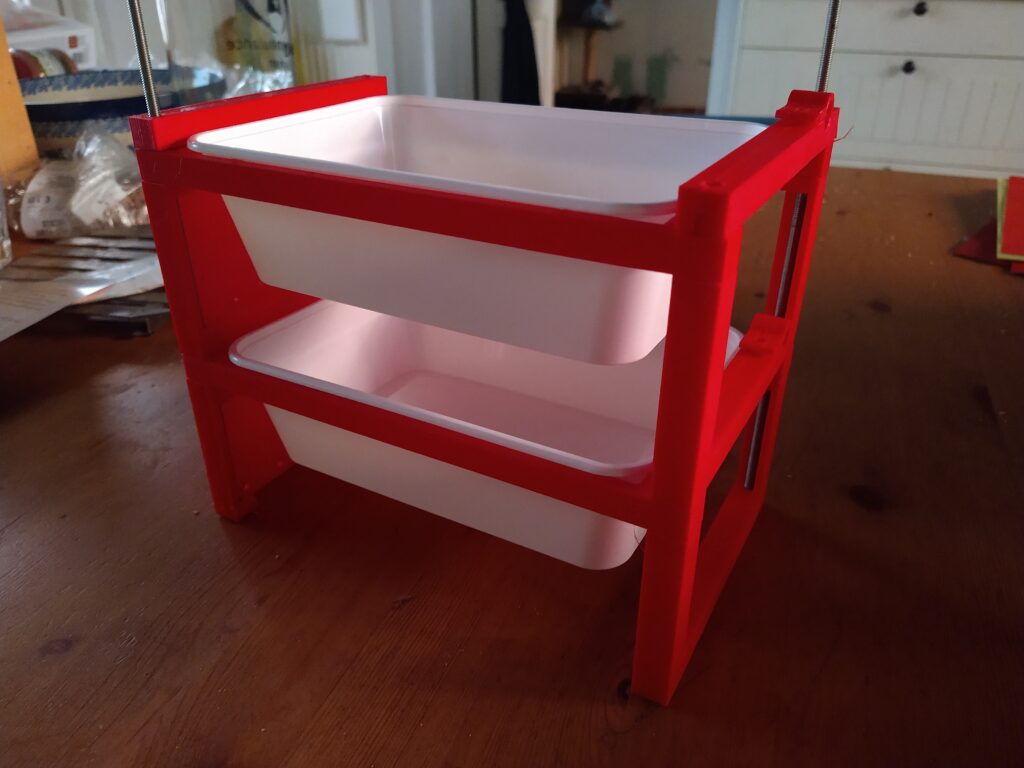
The frame with the trays 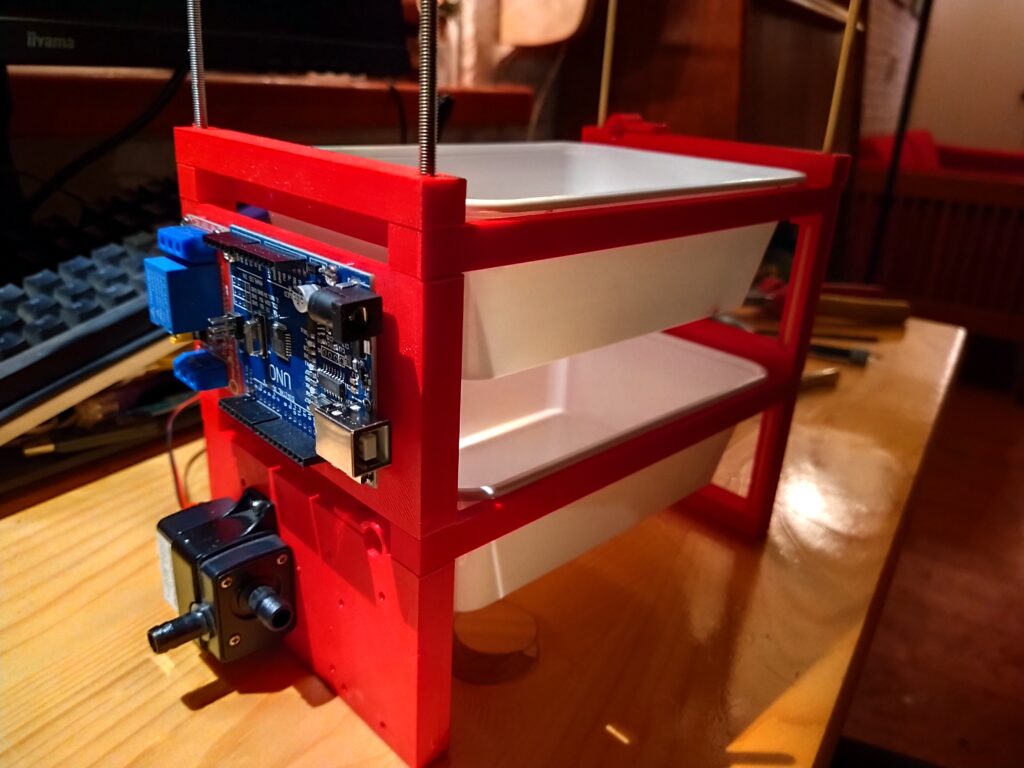
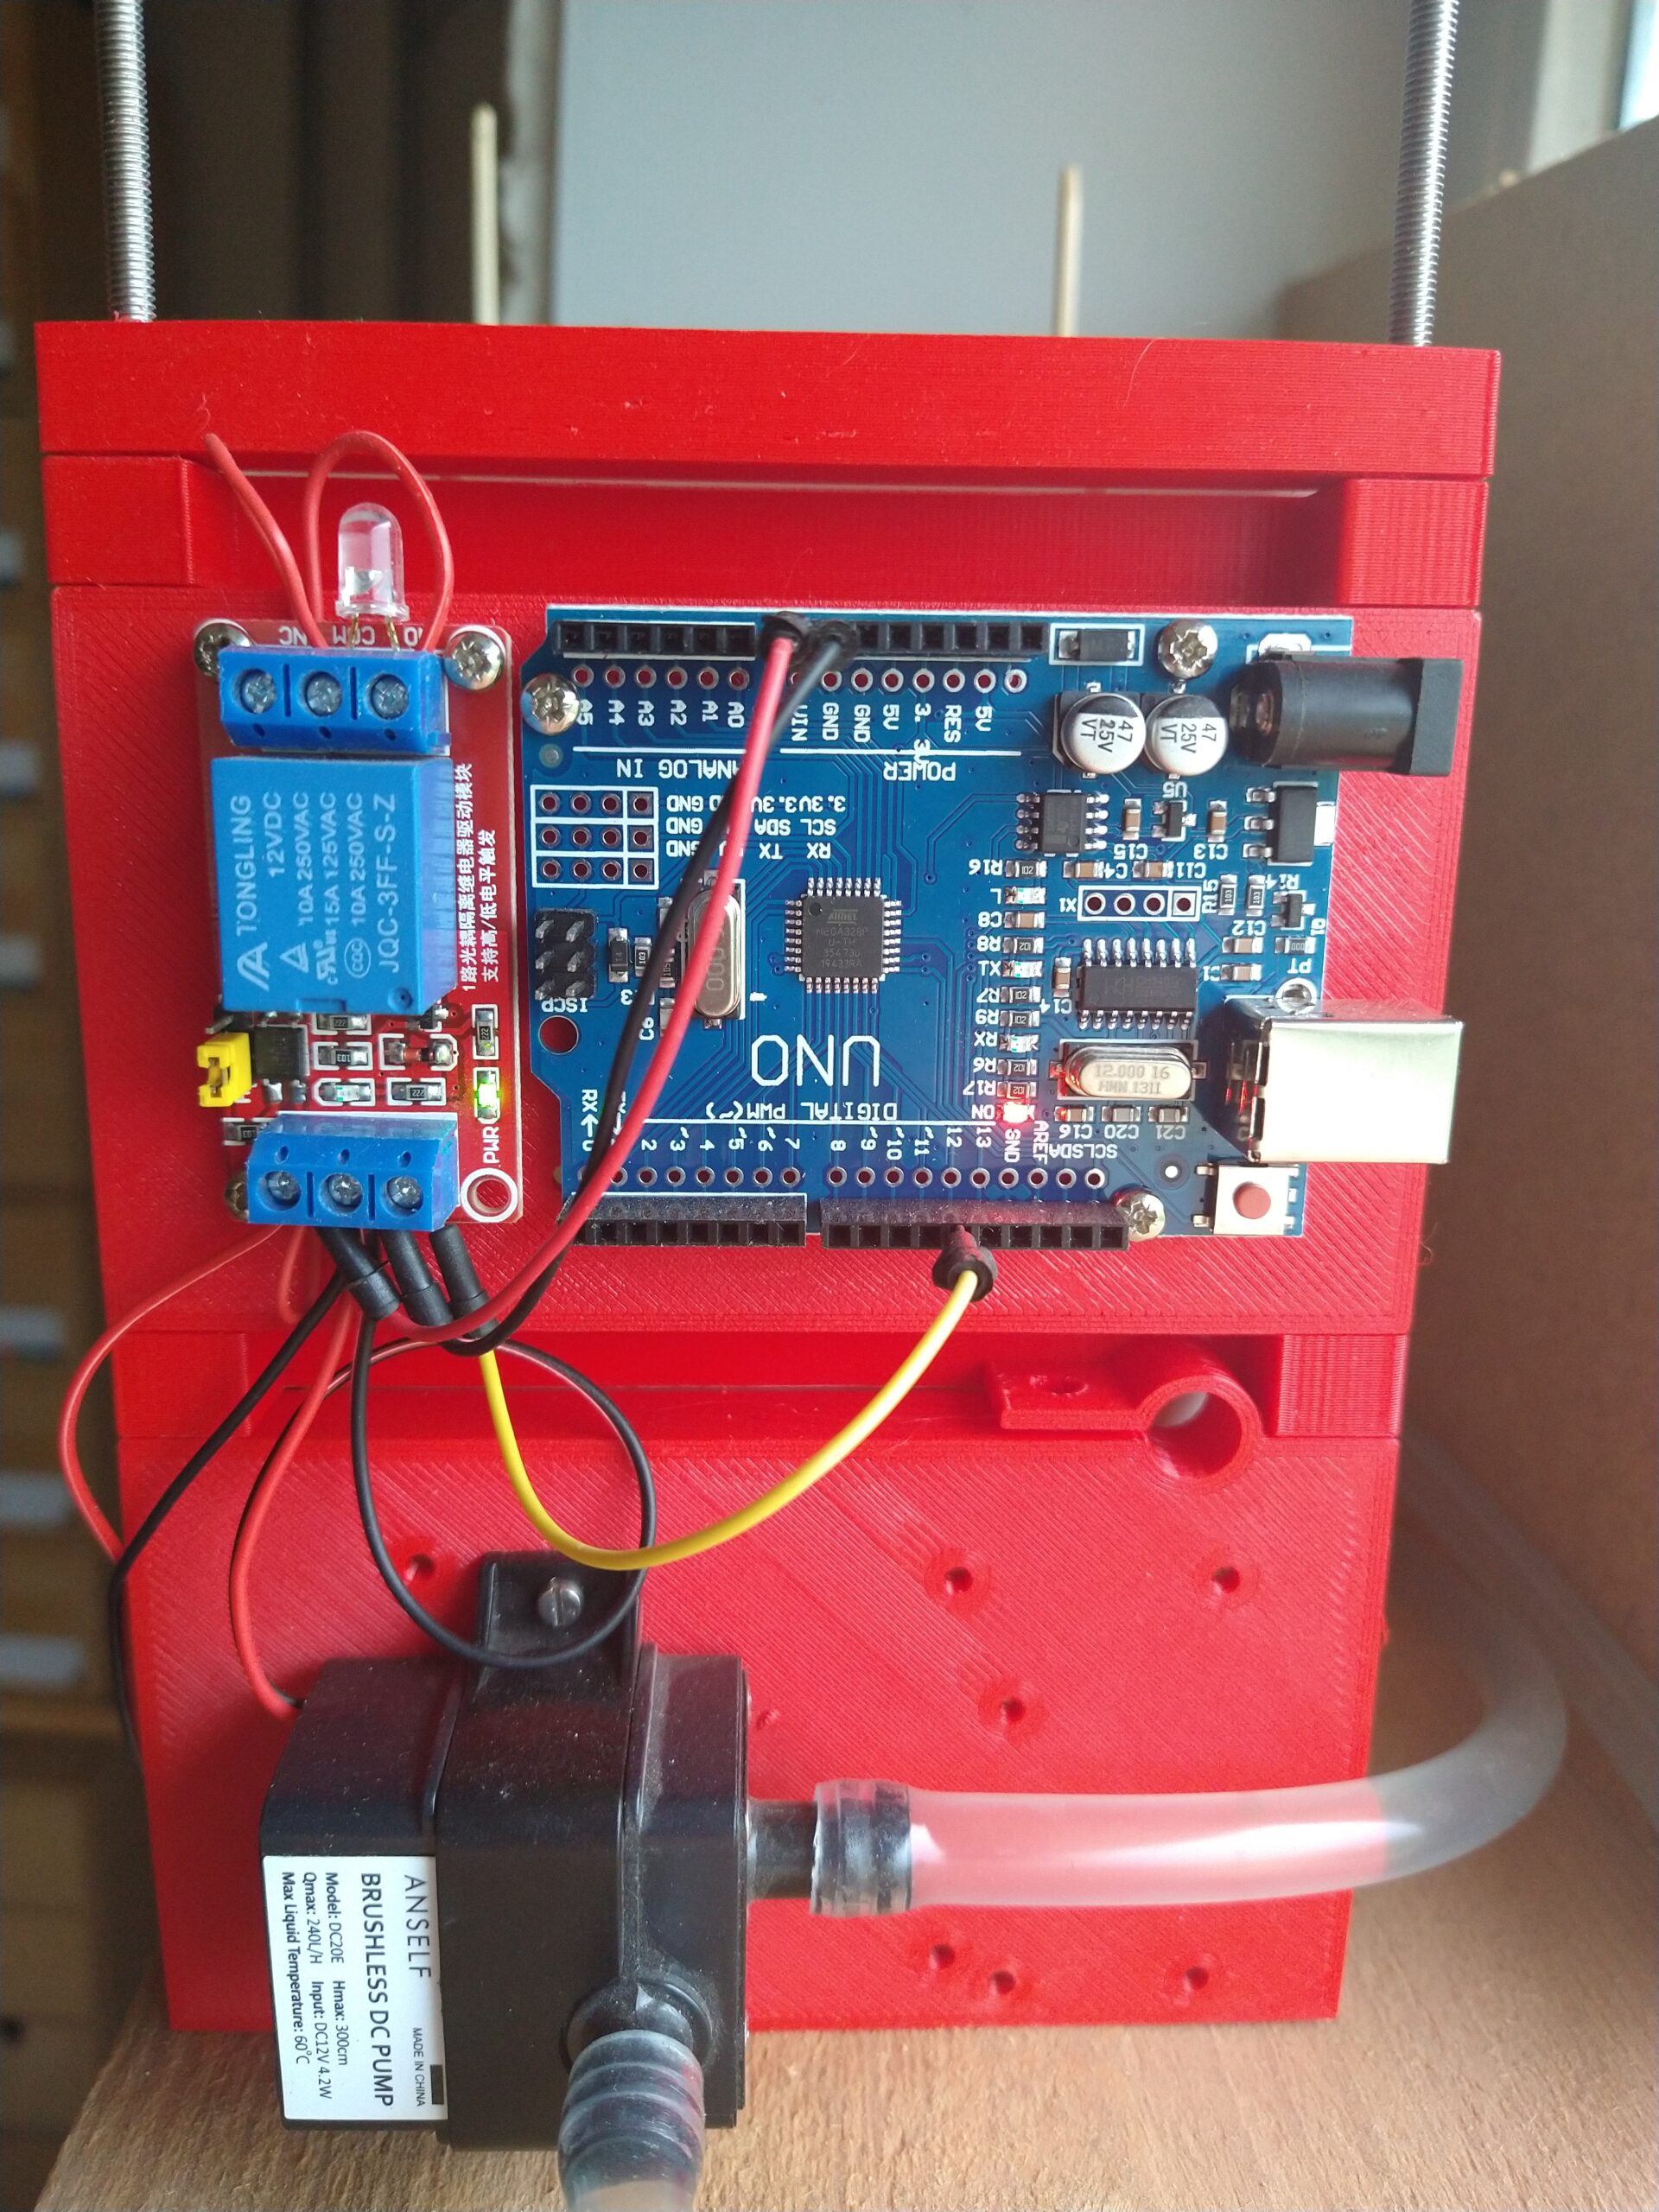
Arduino, relay board and pump mounted. 
Hoses added 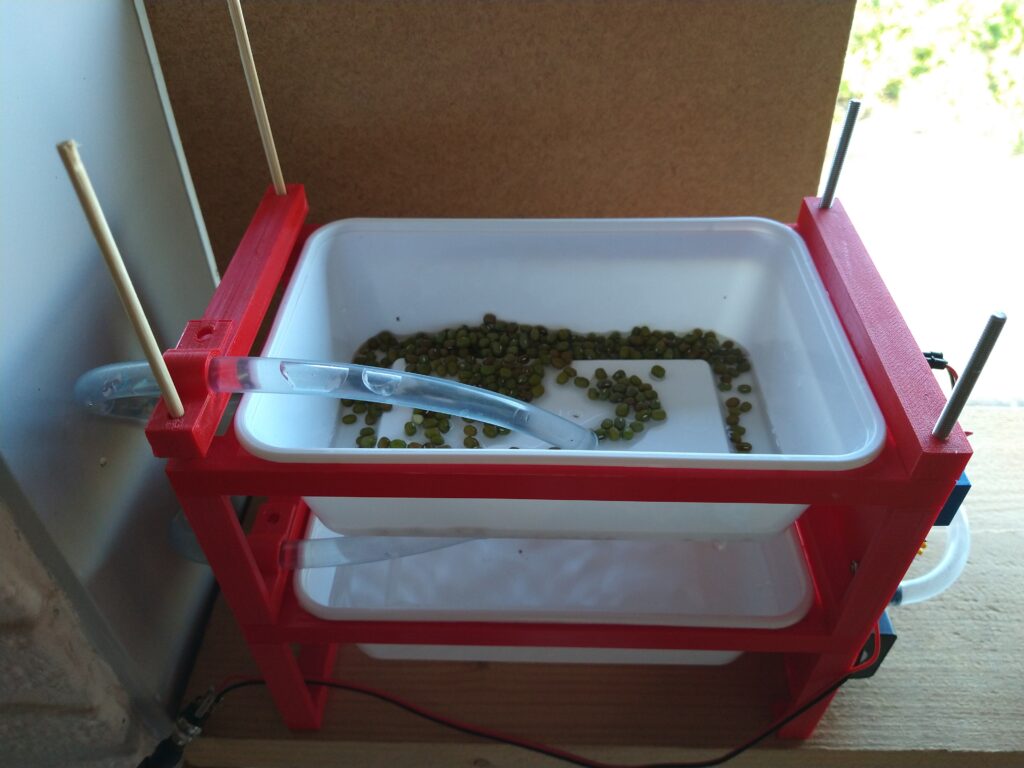
First run 
One week later… time to eat!
Operating the machine
- Put some mung beans in the upper tray.
- Pour drinking water in the lower tray, fill it up to about 3/4 (you may also pour it in the upper tray, the water should leak
- Suck a bit on the hose of the upper tray, allowing water to enter the pump.
- Power up the machine, the beans should get a nice flush now.
- The machine sleeps for 6 hours, then waters the beans again.
- Put the machine in a dark place.
- Wait for 5 to 7 days, you may check the water level once or twice.
- When the bean sprouts are ready, power off the machine and harvest your crops.
- Clean the trays (dishwasher?). Also flush the hoses and pump with clean water.
- Put the trays back, ensure the hose in the lower tray touches the bottom.
- Now start over again with new beans.
Sources
- Frame: https://www.tinkercad.com/things/lchSVqZUVrg
- Arduino code: https://github.com/pa3hcm/weeklySprouts