ATV image generator using the Raspberry PI
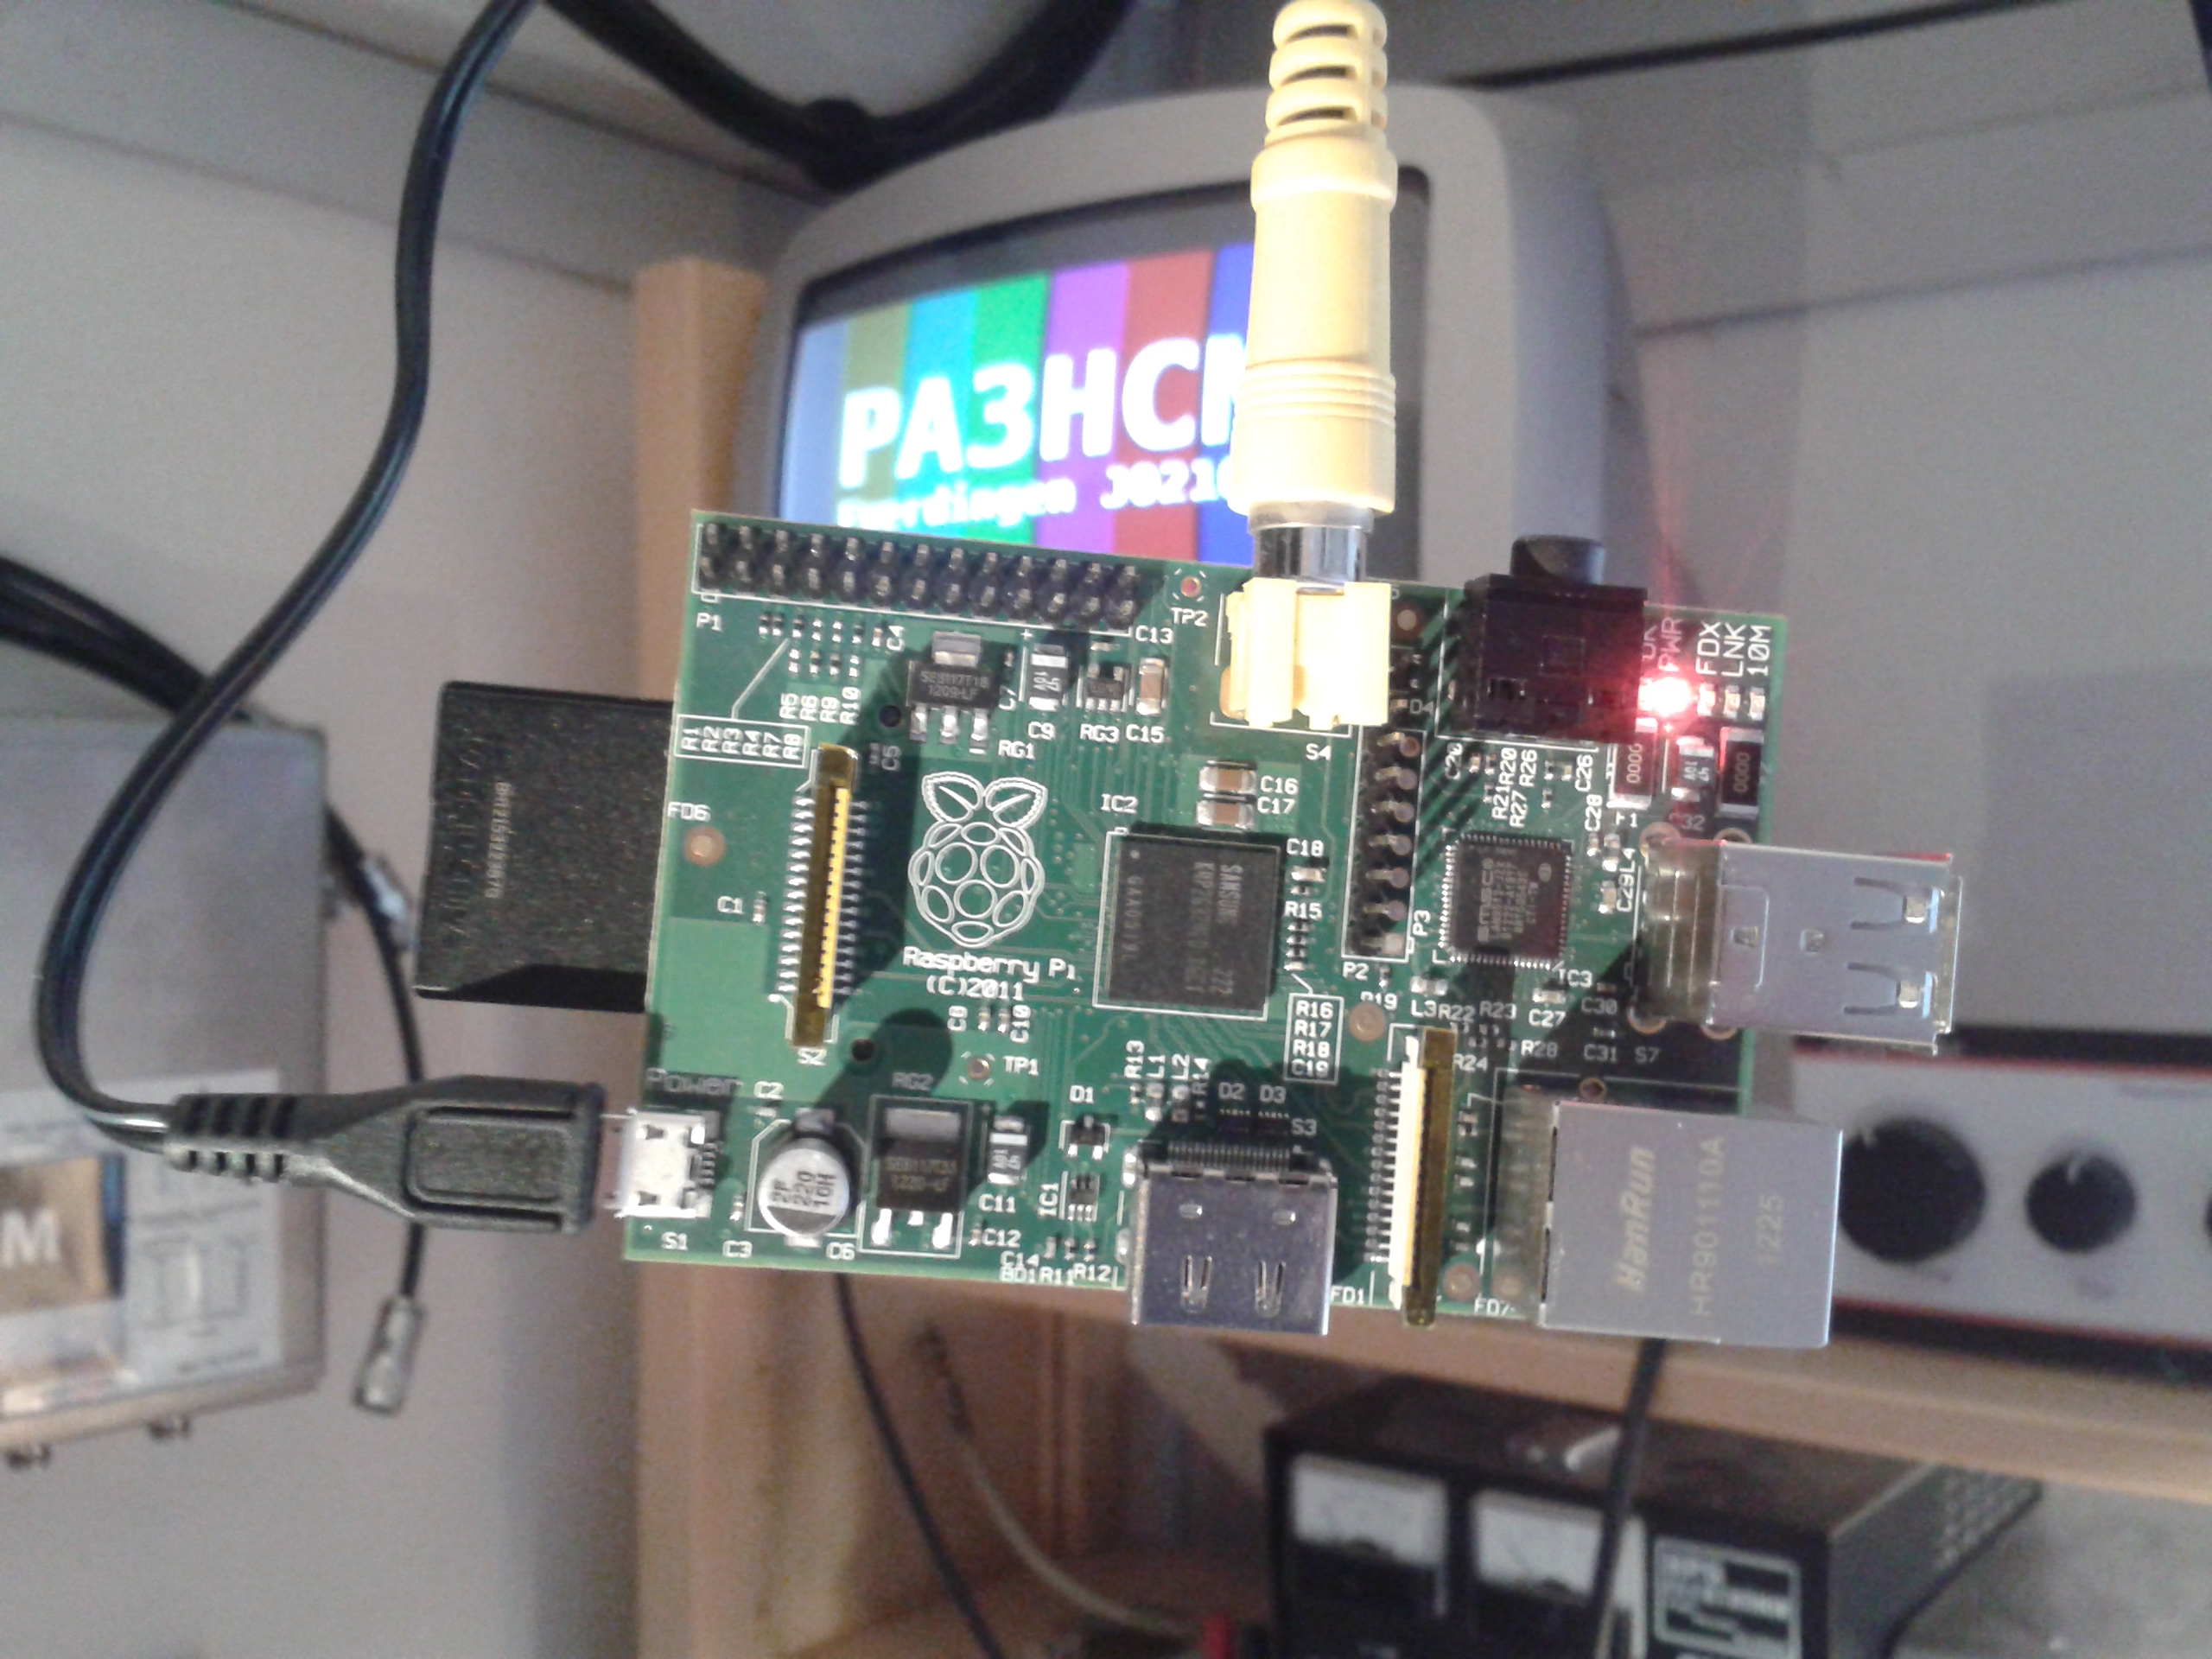
I’ve got a Raspberry PI for a while already, but it hasn’t been very useful until today. I recently started setting up my own ATV (Amateur TeleVision) station. I needed a simple solution to generate a test pattern, something to broadcast when testing my ATV transmitter. Since the Raspberry PI has a composite video output, there must be a way to let the PI do the job.
I found several projects on the internet. However, they produce only HDMI output, no composite video. After browsing the web, I found a very easy solution using the Linux fbi command. This command allows you to load a picture in the frame buffer of the graphics adaptor.
10 Steps
Since the Raspberry PI will run Linux, some basic skills at the Linux command line will be helpful to get the thing running…
Step 1: Get yourself a Raspberry PI and a 4GB SD-card. You will also need a 5V power supply with a Micro-USB connector. Also consider buying a corresponding case (I don’t know how your shack is looking, but mine is always cluttered with solder drops, cut wires, metal tools, and all kind of other things that could create a short circuit at my Raspberry PI).

Step 2: While waiting for the Raspberry PI to arrive, you can create your favourite test pattern or whatever you like. Save it in JPEG format, name it test-pattern.jpg (all lowercase). Note that PAL 4:3 has a resolution of 768 x 576 pixels.
Step 3: Install RaspBian on your Raspberry PI.
Note: This project does not work with Raspbian Jessie yet. For now please use the latest Raspbian Wheezy release until I update the code… some day.
Step 4: Connect display, keyboard and network. Then login at the console using the default username ‘pi’ and the password ‘raspberry’.
Step 5: Get root:
pi@raspberrypi ~ $ sudo su -
root@raspberrypi:~#
Step 6: Install fbi:
root@raspberrypi:~# apt-get install fbi

Step 7: Create a small script called /root/atv-generator.sh using nano:
# nano /root/atv-generator.sh
Enter this text EXACTLY, then use Ctrl-X to save and exit:
#!/bin/bash
/usr/bin/fbi --noverbose -d /dev/fb0 -a /root/test-pattern.jpg
Step 8: Use nano to edit /etc/inittab. Find the line for tty1 and replace it as shown below. This will start the atv-generator.sh script automatically when booting the Raspberry PI.
...
#1:2345:respawn:/sbin/getty --noclear 38400 tty1
1:2345:respawn:/bin/bash /root/atv-generator.sh
2:23:respawn:/sbin/getty --noclear 38400 tty2
3:23:respawn:/sbin/getty --noclear 38400 tty3
...
Step 9: Put the image in the directory /root, be sure it’s named test-pattern.jpg. You may use SCP or SFTP to copy it over the network, or transfer it by USB-stick.
Step 10: Reboot your Raspberry PI and enjoy your test pattern!
Modify composite output settings
In the directory /boot you will find a file named config.txt. Using a text editor you can configure the composite video output. For example, you may configure PAL or NTSC output, aspect ratio and overscan settings. For more information on these settings please have a look here.
Slideshow
For digital ATV some movement is preferred, since a blocking signal results in a still too. Gil F5CAU directed me to this page, which includes some code to run a simple slideshow.
This article was also published in:
hoi,
het werkt simpel.
ik zie alleen onder in beeld;
/root/test-pattern.jpg [ 55% 1000×750 1/1 H . …. enz
ook met 4:3 resolutie krijg ik dit onder in beeld.
de vraag: hoe krijg ik de melding onder in beeld weg?
73
edwin
Edwin, I’ve been looking to remove that text bottom line. Unfortunately the fbi tool has no option for that. There are other framebuffer image viewers available, maybe feh will do a better job.
> Edwin, I’ve been looking to remove that text bottom line. Unfortunately the fbi tool has no option for that.
Try:
fbi -noverbose …
That did the trick! Thanks for the tip, I just updated the code.
Dus it also produce audio via HDMI , like a 1KHz test audio together with your test pattern?
Sorry John, at the moment the code does not include audio. However, it is rather easy to include this if you’re familiar with shell scripting. For example, you can run mplayer in the background to play mp3 files or whatever you want.
Ok, thhnx for the answer. Ill try it
how do i let omplayer play a music at the background?
John, you can modify the script to something like this:
#!/bin/bashmplayer myaudio.mp3 &
/usr/bin/fbi --noverbose -d /dev/fb0 -a /root/test-pattern.jpg
Look at the mplayer man page for more options, e.g. how to use a playlist or how to repeat when the audio is finished.
73, Ernest PA3HCM
[…] Homebrew test pattern generator […]
Would this also work for raspberry pi models with HDMI output? like the b+?thnx
Sure, I don’t see any reason why it wouldn’t work with HDMI. The video signal is sent to both the HDMI and S-video output.
Thats good news.
Coumd you maybe help me. im stuck at step 8. Sorry for asking this. this might sound a stupid question but im new at raspberry pi and programming.
I can’t seem to find where etc/inittab is
John,
Recently Raspbian has moved up to Jessie, which is the new major Debian release. My project was made for Wheezy, the previous release. Although I do not recommend running old software, you might consider using Wheezy for this project, since the Pi is probably working offline most of the time (in my shack it’s living somewhere behind my video switch 😉 )
I think this is the final Raspbian Wheezy: https://downloads.raspberrypi.org/raspbian/images/raspbian-2015-05-07/
73,
Ernest PA3HCM
thanx for the tip
Hi would this project work with the raspberry pi zero?
I am looking for a colour bar generator for testing Cat6 cable runs that have HDMi adaptors at each end and using a laptop is a bit of an overkill.
I know nowt about RP coding as yet.
Reg, I don’t see any reason why it wouldn’t work. The Zero provides both HDMI and composite video output, depending on your settings config.txt (see https://www.raspberrypi.org/documentation/configuration/config-txt.md for reference).
73, Ernest PA3HCM
Hi Ernest.
Happy New Year!
Will this project work on pi Zero running Buster?
Arthur
G7IKG
I haven’t tried it yet, but I don’t see any reason why not. On a Pi 4B you have to enable composite video explicitly by putting ‘enable_tvout=1’ in your config.txt, not sure whether this is the case for the Pi Zero. Also, the Pi Zero has no composite video connector so it’ll require some soldering.